


 English


Building a DIY Book Nook is a creative way to turn a small space between books into a detailed miniature scene. Whether you are assembling a cozy bookstore, a magical alley, a vintage library, or another miniature environment, having the right tools can make the process easier, cleaner, and more enjoyable.
Fortunately, you do not need a professional workshop to build most diy book nook kits. Many beginner-friendly kits include pre-cut components and detailed instructions, so the main tools you need are relatively simple. A few additional tools can become useful when you want to improve precision, customize the design, or work with more detailed miniature components.
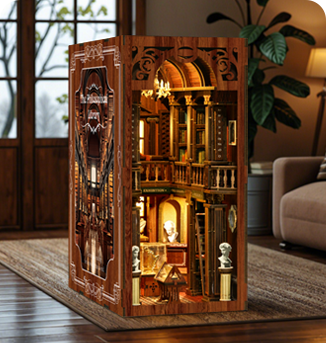
In this guide, we will explain the essential DIY Book Nook tools, optional tools for advanced projects, tools for LED installation, and how to prepare a practical workspace before starting your miniature project.
Do You Need Special Tools for a DIY Book Nook?
For most DIY Book Nook Kits, you do not need expensive or specialized equipment. The basic assembly process usually involves fitting small wooden components together, applying adhesive, assembling miniature decorations, and installing lighting if the kit includes LEDs.
A basic toolkit can include a craft knife, scissors, tweezers, ruler, sandpaper, glue, and small clamps. These tools are inexpensive, easy to find, and suitable for many miniature crafting projects.
The exact tools depend on the kit. Some DIY Book Nook Kits are designed for simple assembly and require very few additional tools, while more detailed projects may benefit from precision cutting, painting, drilling, or electrical tools.
Essential Tools for Building a DIY Book Nook
If you are preparing for your first DIY Book Nook project, start with the following basic tools. You can add more tools later as your projects become more complex.
1. Craft Knife
A sharp craft knife is one of the most useful tools for miniature assembly. It can be used to trim excess material, clean small edges, cut paper decorations, and make minor adjustments to components.
Precision is more important than force when using a craft knife. Small components can be fragile, so make controlled cuts rather than trying to remove material quickly.
For beginners, always use a suitable cutting surface and keep your fingers away from the cutting path. Replace the blade when it becomes dull because a sharp, controlled blade is generally easier to handle than one that requires excessive pressure.
2. Scissors
Small precision scissors are useful for cutting paper, fabric, printed decorations, labels, and other thin materials used in a miniature book nook.
A compact pair of sharp scissors can provide better control than large household scissors when working with small decorative components. If your project contains many tiny paper details, precision scissors can save considerable time.
3. Tweezers
Tweezers are especially helpful when assembling small parts. They allow you to pick up, position, and adjust miniature decorations that are difficult to handle with your fingers.
They can be particularly useful for placing tiny books, signs, plants, furniture pieces, decorative accessories, and LED wires.
For detailed DIY Book Nook Kits, a pair of fine-tip tweezers can significantly improve placement accuracy and reduce accidental movement of small components.
4. Ruler
A small ruler is useful for checking dimensions, aligning components, and making sure decorative elements are positioned consistently.
A metal ruler can also be useful when making straight cuts with a craft knife. For miniature projects, a compact ruler with clear millimeter markings is generally more convenient than a large measuring tool.
5. Sandpaper
Sandpaper can help smooth rough edges on wooden components and improve the fit between pieces. Even when parts are precision cut, small edges may sometimes require light finishing.
Fine-grit sandpaper is usually more suitable for miniature projects because it allows you to remove small imperfections without taking away too much material.
When sanding small components, work slowly and check the fit frequently. Removing too much material can make a joint loose.
6. Glue
Adhesive is one of the most important supplies for a DIY Book Nook Kit. The appropriate glue depends on the materials being joined and the manufacturer's recommendations.
Wood glue can work well for many wooden structural components, while craft adhesive or other suitable adhesives may be more appropriate for paper, fabric, plastic, or decorative parts.
Using too much glue is a common beginner mistake. Excess adhesive can take longer to dry and may leave visible marks on miniature surfaces. Applying a small, controlled amount is usually better.
7. Small Clips or Clamps
Small clips and miniature clamps can hold pieces together while adhesive dries. They are especially useful for walls, frames, shelves, and other structural components that need to remain aligned.
You do not need large woodworking clamps. Small spring clips or miniature clamps are generally easier to control when working on a DIY Book Nook.
What Tools Are Needed for DIY Book Nook LED Installation?
Many modern DIY Book Nook Kits include LED lighting to create a warm and realistic miniature environment. Installing the lighting system does not necessarily require advanced electrical equipment, but a few simple tools can make the process easier.
Wire Cutters
Small wire cutters can be useful when working with LED wires. They allow you to trim excess wire cleanly when the kit instructions require it.
Wire Strippers
If the lighting system requires any wire preparation, a small wire stripper can help remove insulation without damaging the conductor. However, many pre-wired beginner kits do not require extensive wire preparation.
Fine-Tip Tweezers
Tweezers are useful for positioning small LED components and guiding wires through narrow spaces. They are one of the most practical tools for both miniature decoration and lighting installation.
Small Screwdriver
Some DIY Book Nook Kits may include small battery compartments, switches, or other components that require a miniature screwdriver. A small precision screwdriver set can therefore be useful if your kit contains mechanical or electrical components.
Always follow the manufacturer's instructions when installing electrical components and test the lighting system before sealing wires inside the finished structure.
Optional Tools for More Detailed DIY Book Nooks
Basic tools are enough for many projects, but experienced miniature builders may want additional equipment for customization and more precise work.
Precision Cutting Tools
If you frequently customize wooden, paper, or foam components, precision cutting tools can provide greater control. These tools are particularly useful when creating custom shapes or modifying existing miniature components.
Miniature Paint Brushes
If your DIY Book Nook requires painting or customization, a set of fine brushes can help you add color to small furniture, signs, walls, plants, and decorative elements.
Different brush sizes can be useful for different tasks. Larger fine brushes can cover small surfaces, while very small brushes are better for tiny details.
Paint Palette
A small palette can make miniature painting easier by allowing you to mix and control small quantities of paint. You can use a dedicated miniature painting palette or a simple disposable surface.
Small Drill
A miniature hand drill or precision rotary tool can be useful for advanced customization. For example, builders may use small drills to create openings for wires, modify structures, or add custom decorative elements.
This is not normally necessary for a standard beginner DIY Book Nook Kit. It is mainly useful for experienced builders who want to modify the original design.
Magnifying Glass or Magnifying Lamp
Because some miniature components can be extremely small, magnification can help when assembling intricate decorations, positioning tiny parts, or working with LED wires.
A magnifying lamp can be particularly helpful during longer crafting sessions because it combines magnification with additional workspace lighting.
DIY Book Nook Tools for Beginners
If you are building your first DIY Book Nook, there is no need to purchase every tool available. A simple starter kit is usually enough.
| Tool | Main Purpose | Beginner Priority |
|---|---|---|
| Craft Knife | Trimming and precision cutting | Essential |
| Scissors | Cutting paper and thin materials | Essential |
| Tweezers | Handling miniature parts | Essential |
| Ruler | Measuring and alignment | Essential |
| Fine Sandpaper | Smoothing wooden edges | Recommended |
| Suitable Glue | Joining components | Essential |
| Small Clips | Holding parts while glue dries | Recommended |
| Precision Screwdriver | Small screws and battery components | Optional |
What Supplies Do You Need Besides Tools?
Tools are only one part of a miniature crafting setup. Depending on the DIY Book Nook Kit, you may also need several consumable supplies.
Suitable adhesive
Replacement craft knife blades
Fine sandpaper
Paint and miniature brushes
Cleaning cloths
Small storage containers for components
AA or AAA batteries if required by the lighting system
Extra wire for advanced customization
Decorative materials for personal modifications
Before purchasing additional supplies, check the kit's contents. Some DIY Book Nook Kits include many of these components, while others may require the builder to provide glue, batteries, or basic tools separately.
How to Prepare Your Workspace for a DIY Book Nook
A good workspace can be just as important as having the right tools. Because DIY Book Nook components are small, an organized workspace makes it easier to find parts and reduces the chance of losing miniature pieces.
Use a Flat and Stable Surface
Choose a clean, stable table with enough room for the main structure, instructions, tools, and components. Avoid working on a crowded surface where small parts can easily disappear.
Use Good Lighting
Bright, even lighting makes it easier to see small details and identify component numbers. A desk lamp can be particularly useful when working with miniature decorations or LED wires.
Organize Small Components
Use small containers, trays, or zip bags to separate components. Keeping pieces organized according to the instruction sequence can save time during assembly.
Keep the Instructions Nearby
Do not rely on memory when assembling a complex DIY Book Nook Kit. Keep the instructions visible and check each step before applying adhesive.
Common Tool Mistakes When Building a DIY Book Nook
Using the right tools is important, but using them correctly is equally important. Beginners often encounter a few common problems.
Using Too Much Force
Miniature wooden parts are smaller and more delicate than standard woodworking components. Excessive force can break or deform them. If a component does not fit, check its orientation and edges before forcing it into position.
Using Too Much Glue
More glue does not necessarily mean a stronger connection. Excess adhesive can make parts difficult to position and may leave visible marks on the finished model.
Using Dull Blades
A dull craft knife may require more pressure and produce less controlled cuts. Replace blades when necessary and always use appropriate cutting protection.
Skipping Dry Fitting
Dry fitting means placing components together without glue before final assembly. This simple step can help you confirm orientation and identify potential problems before the pieces become permanently attached.
Installing LEDs Too Late
If the kit includes lighting, waiting until the structure is completely closed can make wire installation much more difficult. Follow the instructions and test the lighting at the appropriate stage.
How to Make DIY Book Nook Assembly Easier
The best way to make a DIY Book Nook Kit easier to assemble is to combine proper preparation with careful tool selection.
First, read the complete instructions before starting. Next, organize the components and prepare your basic tools. Then, test-fit important structural pieces before applying adhesive.
When working on miniature decorations, use tweezers instead of trying to hold everything with your fingers. When working on wooden components, use fine sandpaper to improve the fit rather than forcing pieces together.
If your project includes LEDs, test the system before hiding the wires. These simple habits can reduce mistakes and make the overall assembly process much smoother.
DIY Book Nook Tool Checklist
Before starting your next DIY Book Nook, use this checklist to make sure your workspace is ready:
Craft knife
Precision scissors
Fine-tip tweezers
Small ruler
Fine-grit sandpaper
Suitable adhesive
Small clips or clamps
Good workspace lighting
Small storage containers
Precision screwdriver if required
Wire cutters if required
Miniature paint brushes for customization
Small drill for advanced modifications
Frequently Asked Questions About DIY Book Nook Tools
What tools do I need to build a DIY Book Nook?
Most beginners need only a craft knife, scissors, tweezers, ruler, fine sandpaper, suitable glue, and small clips. Additional tools depend on the design and whether the kit includes lighting or requires customization.
Do DIY Book Nook Kits include tools?
It depends on the manufacturer and product. Some kits include selected tools or supplies, while others provide only the main materials and components. Always check the product specifications before purchasing.
What glue is best for a DIY Book Nook?
The best adhesive depends on the materials being joined. Wood glue can be suitable for many wooden components, while craft adhesive may be more appropriate for paper or decorative materials. Follow the manufacturer's recommendations whenever possible.
Do I need a drill to build a DIY Book Nook?
Usually not. A drill is generally an optional tool for advanced customization. Most standard DIY Book Nook Kits are designed to be assembled without drilling.
Do I need special tools to install LED lights?
Many beginner kits use pre-wired LED components and do not require specialized electrical tools. Tweezers, a small screwdriver, and wire cutters may be useful depending on the lighting design.
Can beginners build a DIY Book Nook without experience?
Yes. Many DIY Book Nook Kits are designed for beginners. Clear instructions, pre-cut components, and organized parts can make the assembly process easier for first-time builders.
You do not need a professional workshop to build a beautiful DIY Book Nook. For most projects, a small collection of practical tools is enough: a craft knife, scissors, tweezers, ruler, sandpaper, glue, and small clips can cover most basic assembly tasks.
As you gain experience, you can add precision tools, miniature painting equipment, magnification, or customization tools according to your interests. The most important thing is not to have the largest toolkit, but to have the right tools for the specific DIY Book Nook Kit you are building.
Good preparation, careful component organization, appropriate adhesive, and proper tool selection can make the assembly process easier and help you achieve a cleaner finished result. Whether you are building your first miniature scene or developing more advanced crafting skills, choosing a suitable DIY Book Nook Kit is the best place to start.
Explore our DIY Book Nooks collection to discover different miniature designs, themes, and kit options for your next creative project.